But if your signature is missing an important piece of information, such as a phone number, then you might be wondering how you can add it to your already existing signature. Fortunately this is a simple adjustment to make, which you can accomplish with our short guide below.
Add or Change a Phone Number in an Outlook 2013 Signature
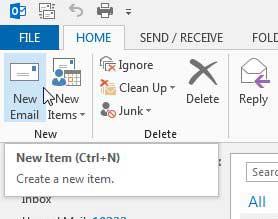
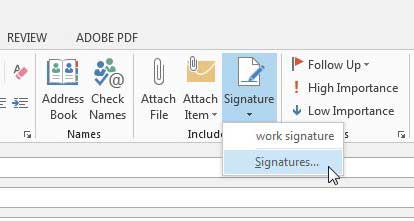
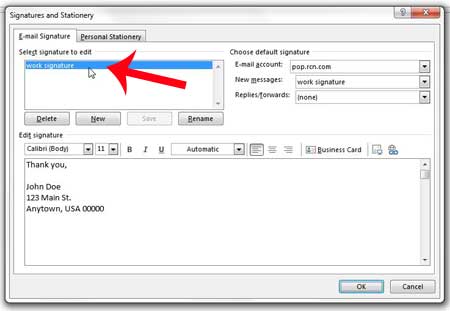
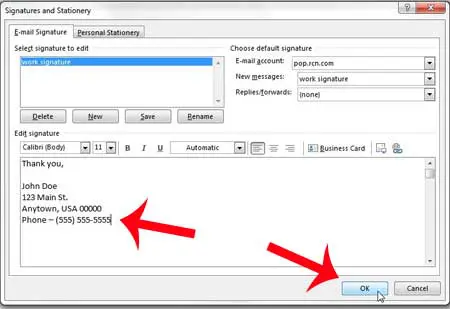
This tutorial will assume that you already have a signature set up in Outlook 2013, and that you merely want to add the phone number to that signature, or change something about it. If you do not already have a signature, you can read this article to learn how to set one up. Step 1: Launch Outlook 2013. Step 2: Click the New Email button at the top-left of the window. Step 3: Click the Signature button in the Include section of the ribbon, then click Signatures. Step 4: Click the signature in the Select signatures to edit box to which you want to add the phone number. Step 5: Click inside the Edit signature box at the bottom of the window and add the phone number. Click the OK button to save your changes. Do you also want to add a link to a website or social media to your signature? Learn how with this article. After receiving his Bachelor’s and Master’s degrees in Computer Science he spent several years working in IT management for small businesses. However, he now works full time writing content online and creating websites. His main writing topics include iPhones, Microsoft Office, Google Apps, Android, and Photoshop, but he has also written about many other tech topics as well. Read his full bio here.
You may opt out at any time. Read our Privacy Policy