But many of the emails that you receive may have similar subjects and begin the same way, which can make it tough to distinguish similar emails from one another. One way to help this problem is by showing more message preview lines in your inbox. This is a setting that you can control in Outlook 2013, and you can select between 0 and 3 preview lines. So continue below to see how to make that adjustment.
How to Adjust the Number of Outlook 2013 Preview Lines
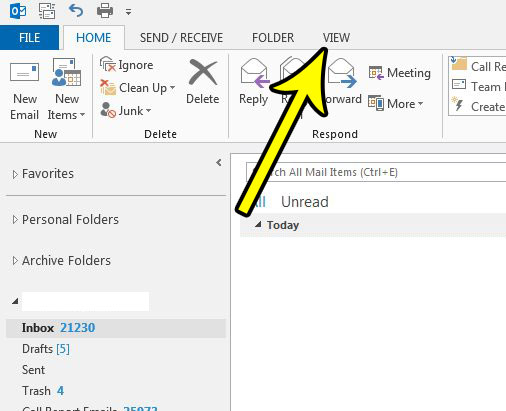
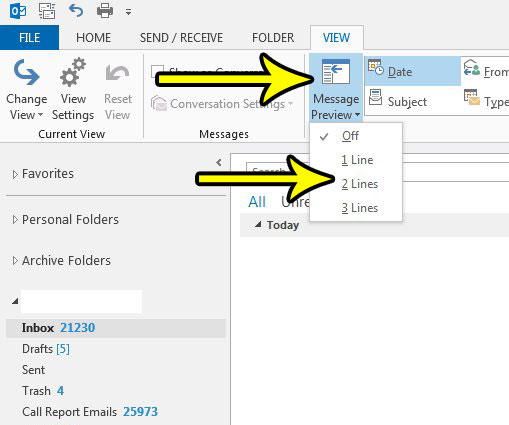
The steps in this article will change the number of preview lines that are shown with the email messages displayed in your inbox. You will be able to select from 0 preview lines, up to a maximum of three preview lines. Note that the amount of space dedicated to each message in your inbox will increase with the number of preview lines you select. Step 1: Open Outlook 2013. Step 2: Click the View tab at the top of the window.
Step 3: Click the Message Preview button, then choose the number of preview lines that you wish to display for each message.
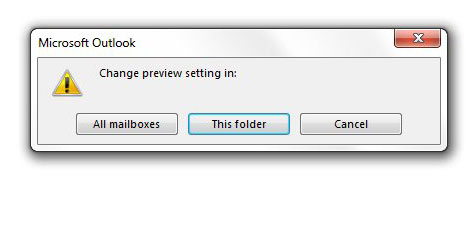
Step 4: Click the All mailboxes button or the This folder button, depending upon how you wish to apply this change.
Do you wish Outlook would look for new emails more often? Find out how to change the send and receive frequency so that you get emails into your inbox a little more quickly. He specializes in writing content about iPhones, Android devices, Microsoft Office, and many other popular applications and devices. Read his full bio here.