Crossing out text in a Word document can be done for similar reasons, but it can also be helpful if a group is collaborating on a document and one group member feels that a segment of text should be removed. By using strikethrough to cross out the text it is understood that the text should be deleted, but it is still available in case it needs to be re-added later. You can follow our steps below to learn how to cross out text in your Word 2013 document.
Use Strikethrough in Word 2013
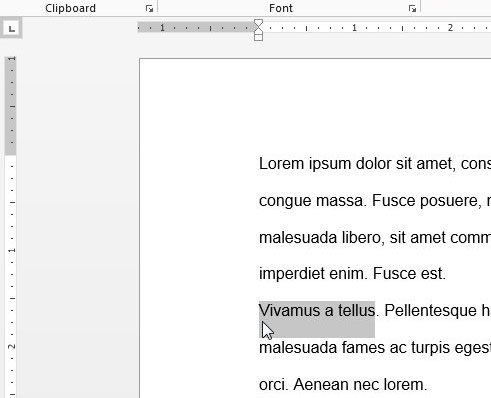
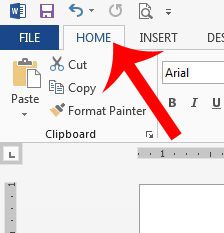
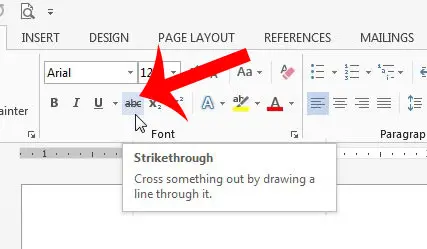
The steps in this article will show you how to format text so that it appears to be crossed out. This effect is called “strikethrough” and it is available as a text formatting option in Word 2013. This article will assume that you already have an existing document that contains the text which you want to cross out. If you want to switch your text to all small caps, you are able to do that as well. Step 1: Open the document containing the text that you want to cross out. Step 2: Select the text that you want to cross out. Step 3: Click the Home tab at the top of the window. Step 4: Click the Strikethrough button in the Font section of the navigational ribbon. If you decide later that you want to remove the strikethrough from the text, simply re-select the strikethrough text, then click the Strikethrough button in Step 4 again to remove it. Google Docs also lets you draw a line through your text. Check out out article here for more information how to accomplish it. Do you need to add a background picture to your Word document? This tutorial will show you how you can use a picture on your computer as the background of a document. After receiving his Bachelor’s and Master’s degrees in Computer Science he spent several years working in IT management for small businesses. However, he now works full time writing content online and creating websites. His main writing topics include iPhones, Microsoft Office, Google Apps, Android, and Photoshop, but he has also written about many other tech topics as well. Read his full bio here.


