Our article continues below with additional information and pictures for each of the steps. Many applications that let you type in them will include some features to help you with spelling and grammar. Some of the tools that can perform this function require you to run a spell checker or a grammar checker, while other tools will make corrections automatically. Google Docs has an autocorrect feature that can fix misspellings as you type them. Our guide below shows you how to turn off autocorrect in Google Docs if you no longer want it to make those corrections automatically. Once you’ve fixed the issue with autocorrect, check out our Google Docs remove space after paragraph tutorial to see how to get rid of extra space in your documents.
How to Turn Off Google Docs Autocorrect
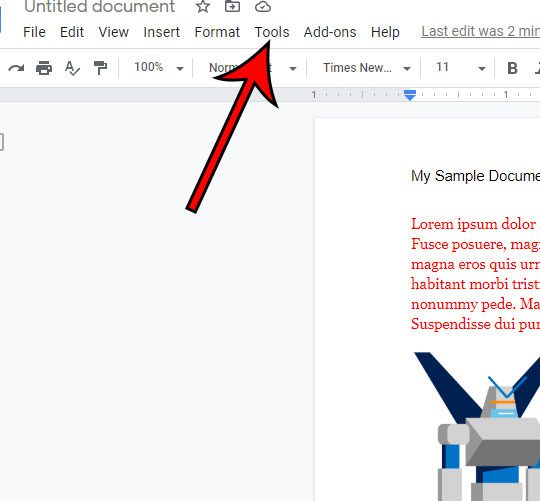
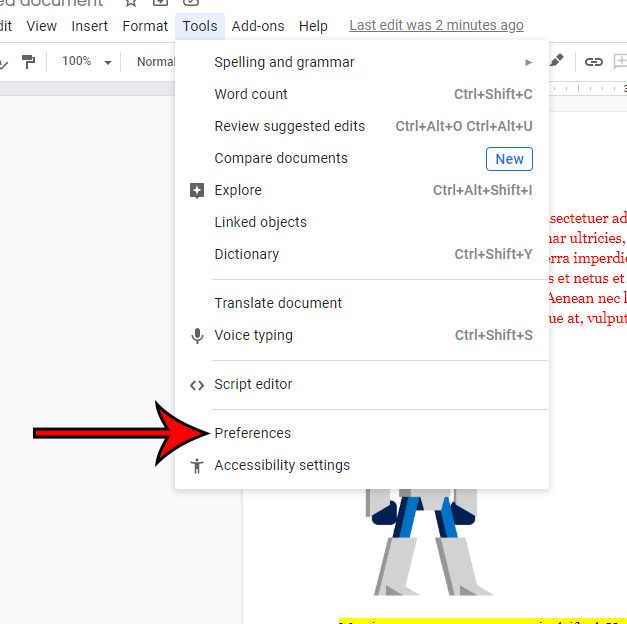
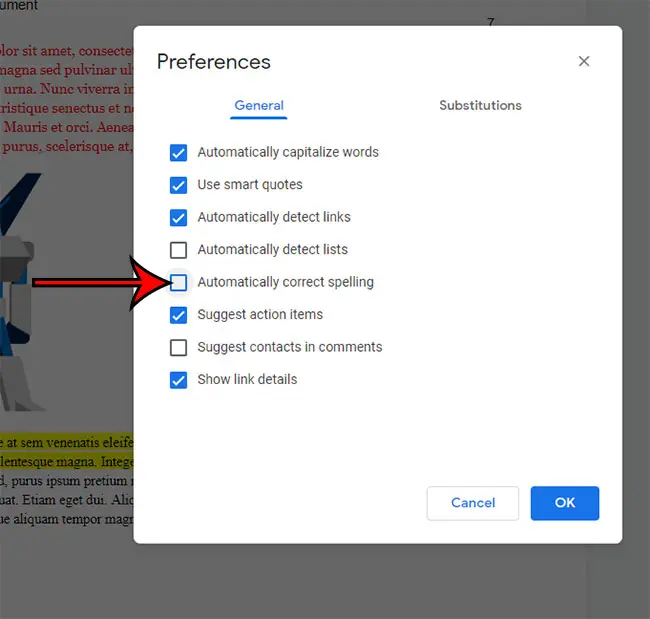
The steps in this article were performed in the desktop version of the Google Chrome Web browser, but will also work in other desktop browsers like Edge or Safari. Step 1: Sign into Google Drive and open a Google Docs file. Step 2: Select the Tools tab at the top of the window. Step 3: Choose the Preferences option at the bottom of the menu. Step 4: Click the box to the left of Automatically correct spelling to remove the check mark, then click the OK button. You can also elect to turn off the Automatically capitalize words option as well if you don’t want Google Docs to make capitalization corrections either.
See also
How to change margins in Google DocsHow to add strikethrough in Google DocsHow to add a row to a table in Google DocsHow to insert a horizontal line in Google DocsHow to change to landscape orientation in Google Docs
After receiving his Bachelor’s and Master’s degrees in Computer Science he spent several years working in IT management for small businesses. However, he now works full time writing content online and creating websites. His main writing topics include iPhones, Microsoft Office, Google Apps, Android, and Photoshop, but he has also written about many other tech topics as well. Read his full bio here.


