This article will show you how to make a bookmark in Word 2013 at any location in the document, allowing you to use it later if you need to link to that spot.
Add a Bookmark in Microsoft Word 2013
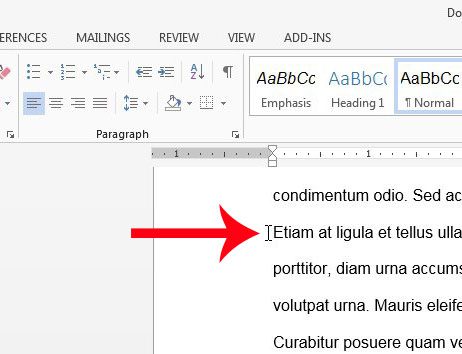
The steps in this article will show you how to create a bookmark in a Word 2013 document. You can use this bookmark to link to the bookmarked part of the document from other locations in the document. For example, if you wanted to create a table of contents where people could click something in the table of contents to go directly to another part of the document, then this could accomplish that goal for you. Step 1: Open the document in Word 2013. Step 2: Click at the point in the document where you want to insert the bookmark.
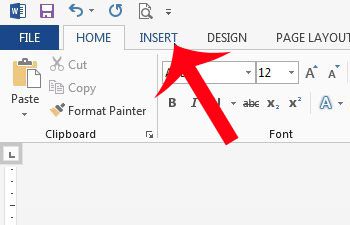
Step 3; Click the Insert tab at the top of the window.
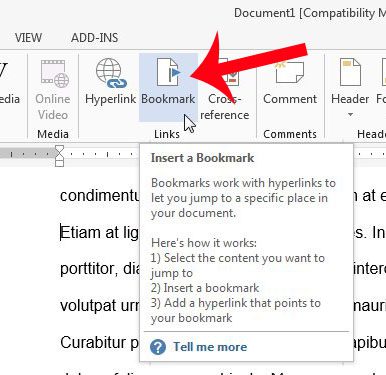
Step 4: Click the Bookmark button in the Links section of the navigational ribbon at the top of the window.
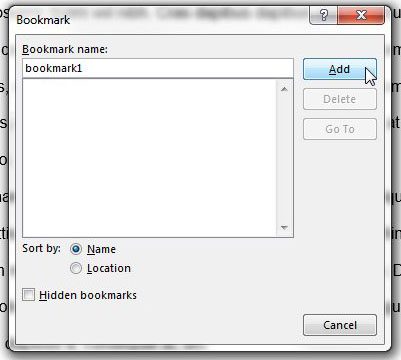
Step 5: Type a name for the bookmark into the field at the top of the window, then click the Add button.
You can then create hyperlinks in other parts of the document that link to the bookmark that you just created. You can learn how to create a hyperlink in Word 2013 and start adding links to Web pages and other parts of your document. After receiving his Bachelor’s and Master’s degrees in Computer Science he spent several years working in IT management for small businesses. However, he now works full time writing content online and creating websites. His main writing topics include iPhones, Microsoft Office, Google Apps, Android, and Photoshop, but he has also written about many other tech topics as well. Read his full bio here.