Spreadsheets can quickly become difficult to read as you add a lot of information. It becomes even more complicated when the information in your columns is very similar to other columns. One way to simplify this is by creating a header row. By entering a description of the type of information that is contained within a column it becomes easier to edit, and the information is easier to read. Once you’ve added those descriptions, you can then choose to freeze that header row at the top of the sheet. This allows you to scroll further down in the spreadsheet while still keeping the header row visible. Our guide below will show you how to create a header row in a Google Sheets spreadsheet.
How to Make a Google Sheets Header Row
Our article continues below with additional information on adding a header row to a Google Sheets spreadsheet, including pictures of these steps. The Microsoft alternative to Sheets, Excel, has many of the same features. For example, our guide on creating tables in Excel shows you how to turn a selection into a table in that application.
How to Create a Header Row in Google Sheets (Guide with Pictures)
The steps in this article were performed in the desktop version of the Google Chrome Web browser, but will also work in other desktop browsers like Firefox or Safari.
Step 1: Sign into Google Drive and open your spreadsheet or create a new one.
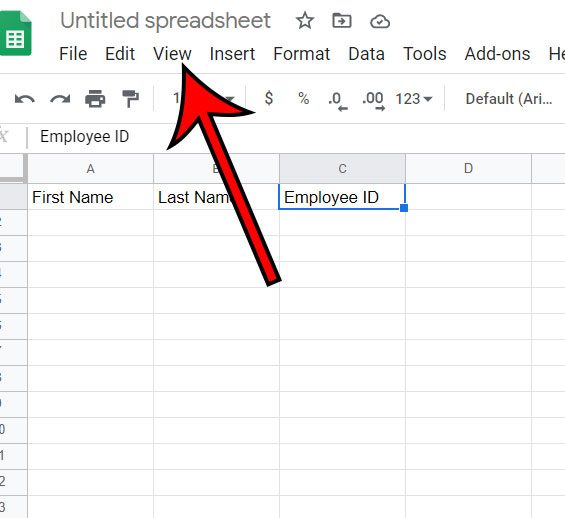
Step 2: Type a description for the first column into the A1 cell, then repeat for each additional column in the spreadsheet.
For example, in the image below I have three columns. The “First Name”, “Last Name”, and “Employee ID” text are all going to be the headers for the data that is contained in the rest of the cells in those columns.
Step 3: Select the View tab at the top of the window.
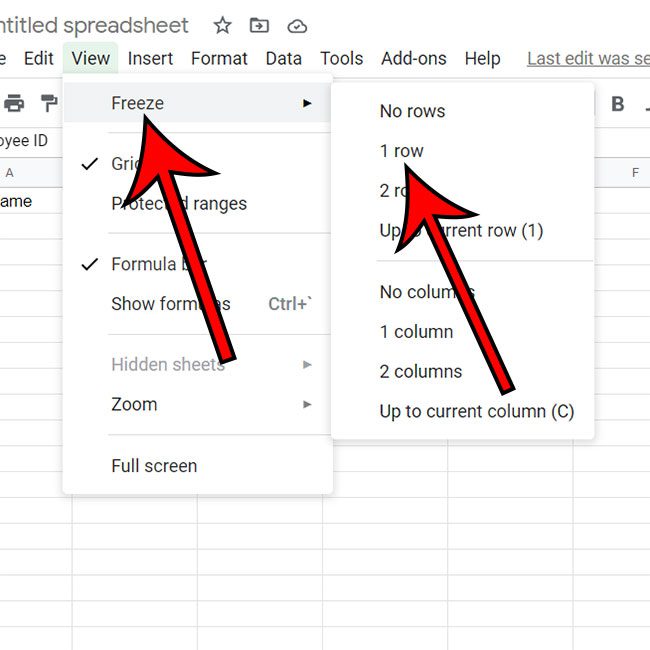
Step 4: Click Freeze, then choose the 1 row option.
Now when you scroll down in your spreadsheet the header row will stay frozen at the top of the spreadsheet so that you can easily add the correct information in each of your columns. Since you know how to make a Google Sheets header row you will be able to use this skill in the future to make your spreadsheets much easier to read and understand, which is something that your readers will really appreciate. If your spreadsheet already has data in its cells then you can insert a new row at the top by right-clicking on the row 1 label at the left side of the window and choosing the Insert 1 above option. This will slide all of your data down one row. If you switch back and forth between Google Sheets and Microsoft Excel, then read our guide on adding columns in Excel to learn about a fast and easy method for totaling column values in a spreadsheet.
More Information on How to Make a Header Row in Google Sheets
For many spreadsheets it’s is very likely that you only want to freeze the first row. The important part when you freeze rows in a spreadsheet is ensuring that they stay visible when you scroll so that you don’t place data into the wrong column. But you may want to freeze more than one row if your spreadsheet structure requires multiple columns, or if you are using more than one row to display important information. If so, you can choose to freeze rows up until the one that is currently selected in your spreadsheet. You must first place the headers for each of your columns into the cell in the first row, then you can select the View tab at the top of the window and elect to freeze the top row. This will ensure that the data in that first row remains visible as you scroll down through the rest of the spreadsheet. While a header row in a spreadsheet identifies the type of data that is in a column, a “header” in a spreadsheet is going to contain information like page numbers, or perhaps an author name, a company logo, or a name for the spreadsheet. You can create a header in Google Sheets by going to File > Print then clicking the Headers & footers tab at the right side of the window. There you will be able to select the type of data that you want to include in the header. You can also select the Edit Custom Fields option if you would like to include data in the header for which there isn’t a listed option. While our article focuses specifically on freezing the top row so that it stays visible, as well as making it possible to print that row at the top of every page, simply placing a description in the first row is often sufficient for turning that row into a header row. To select a row, click the row number that appears at the left side of the window. You can use the same action to select an entire column by clicking that column letter at the top of the sheet. The View menu at the top of the window contains not only the option to freeze rows, but also hide or show gridlines, view formulas, or zoom in on your data. While it doesn’t have the various viewing options that you would find in Microsoft Excel, many Excel users have found Google Sheets to be a fairly capable alternative to Microsoft’s paid spreadsheet application. Using Google Sheets as a former Excel user can require a bit of a transition period. While many of the features in the application are easy to find, certain things, especially printing and viewing options, may require a bit of experience before you become familiar with them. If there’s something that you want to do which affects the way that your Google Sheet appears on the screen or when you print, then there is likely a way to apply that change. Definitely familiarize yourself with the the View menu and the menu found at File > Print, as that is where most of those options are found.
Additional Sources
How to merge cells in Google Sheets How to wrap text in Google Sheets How to alphabetize in Google Sheets How to subtract in Google Sheets How to change row height in Google Sheets
After receiving his Bachelor’s and Master’s degrees in Computer Science he spent several years working in IT management for small businesses. However, he now works full time writing content online and creating websites. His main writing topics include iPhones, Microsoft Office, Google Apps, Android, and Photoshop, but he has also written about many other tech topics as well. Read his full bio here.
You may opt out at any time. Read our Privacy Policy